Ingredients for the cake: 65g shelled eggs, 5 pieces; 90g cake flour; 50g milk; 40g corn oil; 60g granulated sugar for egg whites.
Cake making process: Step 1: Prepare the ingredients – cake flour, 65g fresh shelled eggs, granulated sugar, milk, corn oil; Step 2: Separate the egg whites and yolks, placing the whites in an oil-free and water-free clean bowl; Step 3: Beat the yolks with a whisk until broken, mix in corn oil, then add milk and whisk until uniform without any oil spots; sift in cake flour; Step 4: Mix the flour and yolk batter in an irregular direction with a whisk, lifting the whisk to let the batter fall like a ribbon; set aside; Step 5: Use an electric mixer to beat the egg whites at high speed until bubbles form, then add sugar in three stages – after coarse bubbles form, after fine white foam forms, and after more textured fine white foam forms; after the third addition of sugar, switch the mixer to medium-low speed to make the bubbles in the meringue smaller and the meringue smooth and shiny; when resistance is felt, turn off the mixer, and the meringue should form a small peak or curve; Step 6: Take 1/3 of the meringue and mix it into the yolk batter with a whisk, then pour it back into the meringue bowl; Step 7: Use a spatula to fold the meringue and yolk batter together from the 2 o’clock position to the 8 o’clock position, moving upwards from the bottom, with the spatula moving in a clockwise direction while the bowl rotates counterclockwise, resulting in a smooth and shiny cake batter; Step 8: Clean the inner pot of the rice cooker in advance, ensuring it is oil-free and water-free; pour the cake batter into the pot and smooth the surface with a spatula; Step 9: If the rice cooker has a ‘cake’ function, simply press it and wait for the cake to be ready, if not, use the rice cooking function, which should take about an hour; different rice cookers have different times and power, so adjust the time according to the actual situation; Step 10: When the time is up, do not keep the lid closed, open it directly, remove the inner pot, and invert it on a cooling rack; Step 11: The inner wall of the rice cooker is non-stick, after inverting for about 10 minutes, the cake will automatically demold without any manual effort; Step 12: Look, apart from a little cake skin sticking to the rice cooker pot, it can be wiped off with a hand, leaving the inner wall smooth and clean, with no moisture retention.
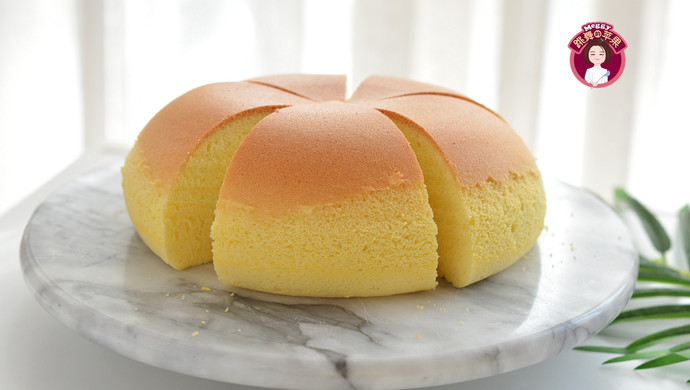
The brands of rice cookers vary, and so do their programmed. settings Not all rice cookers have a ‘cake’ program, which would make the process much more convenient if available. If your rice cooker lacks this feature, you can experiment with the rice cooking program to find the most suitable timing. Compared to oven-baked chiffon cakes, the rice cooker version offers a more moist texture, lacking the dryness often found in oven-baked goods. It melts in your mouth, resembling the texture of a light cheesecake. The storage method for rice cooker chiffon cakes is the same as for oven-baked cakes; they can be stored in a container in the refrigerator or kept at room temperature for 1-2 days. There are tricks to making delicious dishes, and each of my recipes has its own little secret. You can search for ‘cake’ to directly view my recipes!

